It may be pretty irritating to be unable to open a shared mailbox, especially if you want a particular piece of information or a specific file to accomplish a work-related activity. If you’re an IT administrator, this situation may be much more frustrating because you’re continually asked when the problem will be resolved.
If the shared Mailbox does not open, you may try disabling, restarting Outlook, and re-enabling Cached Exchange Mode in your Outlook profile’s advanced profile configuration options.
A shared mailbox, in essence, serves as a centralized service that allows several individuals to operate in unison. Even if you have a tight deadline, you may quickly resolve this issue with the aid of our troubleshooting instructions.
What Should You Do If You Are Unable to Open a Shared Mailbox in Office 365?
Remember that a connected account in a subsidiary domain cannot access some shared mailboxes hosted on Outlook 2016 or later. Users with such accounts should have no trouble accessing OWA and Outlook 2013. However, they cannot open the Mailbox in Outlook 2016 and later or in Office 365 versions of Outlook.
If this problem occurs after you granted a user full access to the Shared Mailbox, wait a few hours before attempting again. It is possible that the account needs more time to sync with the hosted server.
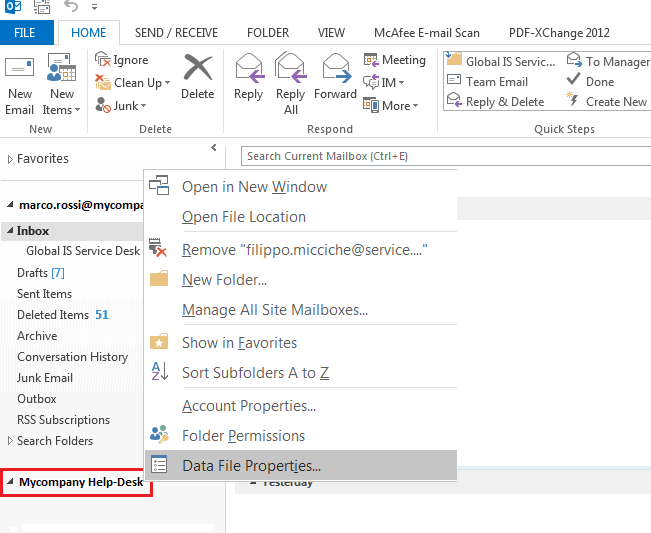
Disconnect and reconnect the shared mailboxes.
This short step might restore sync to the shared inbox. Experiment with disconnecting and reconnecting the Shared Mailbox to your Outlook profile.
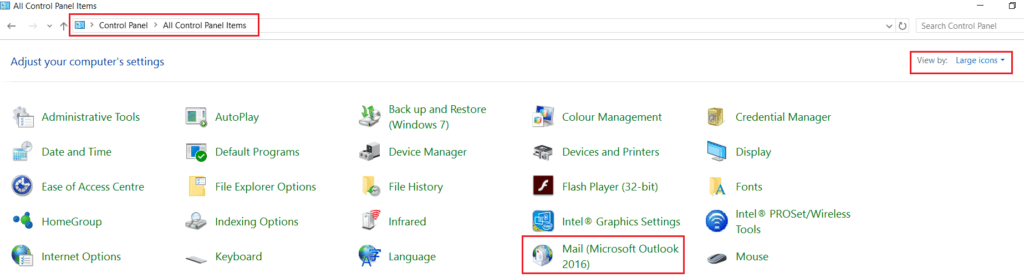
- Navigate to Start > Control Panel (View by Large Icons) > Mail.
- Disconnect and reconnect the Shared Mailbox
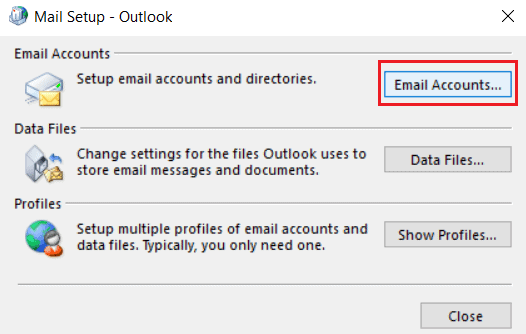
- The Mail Setup dialogue box will appear.
- Select Email Accounts.
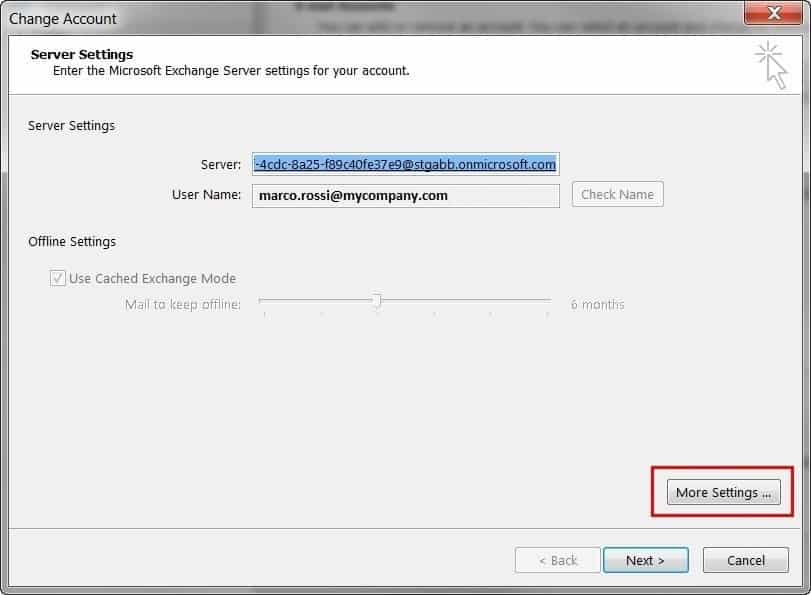
- Choose your profile and then click Change.

- Choose More Options.
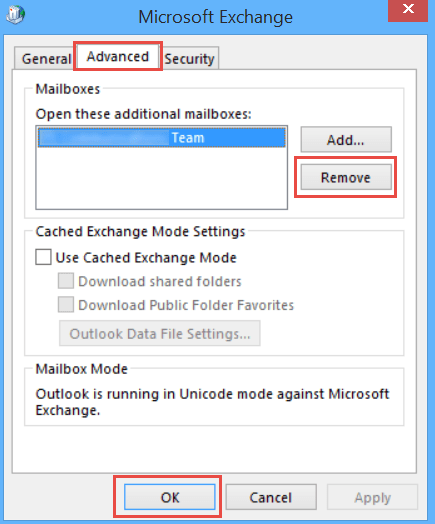
- Select the Shared Mailbox and click Remove on the Advanced tab.
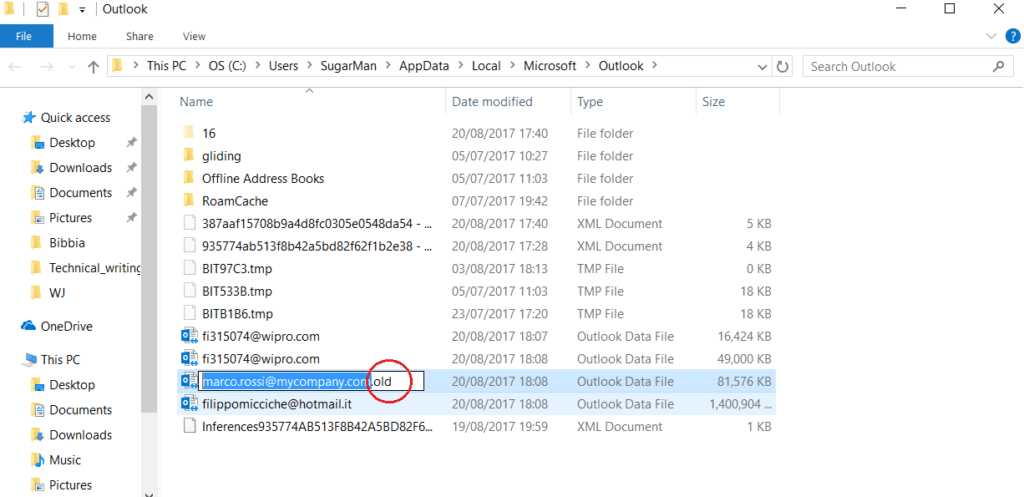
Change the name of the Offline Outlook Data File (.ost)
When you use an Exchange account, the Cached Exchange Mode functionality is enabled by default. It works by locally saving (caching) a duplicate of your Mailbox on your computer.
Accessing a local copy speeds up access to your data and allows you to work on Outlook offline.
You may view and react to your cached messages while offline. Any new messages or modifications to your Mailbox on the server will be immediately sent/received once Outlook (mainly the .ost File) reconnects.
If the shared Mailbox is not synchronizing, you may try disabling, restarting Outlook, and re-enabling Cached Exchange Mode in your Outlook profile’s advanced profile configuration options.
- Click File > Account Settings > Account Settings.
- Highlight the Exchange account and then click Change.
- Go to More Settings.
- Restart Outlook, re-enable the checkbox, and see if the issue persists.
Modify Your Mailbox Settings
Here’s a solution that worked for many users: To begin, delete the shared Mailbox from Outlook. Then, change the reply address back to the original address and add it to Outlook again.
Essentially, you must reset the email address policy to re-assign the problematic address as the reply address.
Enable Autodiscover
1. Create an Autodiscover DNS record with your DNS provider first.
2. Start by opening the Control Panel and typing mail into the search box.
3. Select your mail version and then click the Show Profiles button.

4. display mail profiles on Windows 10
5. To create a new profile, click Add and fill out all of the needed information.
6. Wait until Outlook has finished looking for server settings.
7. Allow the Autodiscover prompt to display on the screen.
8. Enter your email address as well as your password.
9. When you receive confirmation that your server settings have been correctly configured, click Finish.
Remove automapping for shared mailboxes.
Automapping is a handy Office 365 tool that maps the content of shared mailboxes to your Outlook account. However, when users start Outlook for Office 365, this functionality may occasionally create different performance issues.
Disabling automapping may solve the issue.
- Connect to Exchange Online using remote PowerShell.
- Run the following command to remove full access rights and automapping: Delete-MailboxPermission -Identity Mailbox ID1> -User Messagebox ID2> -AccessRights Complete Access.
- Check to see whether you can now access the Shared Mailbox.
Using the Outlook online interface, check the availability of shared mailboxes.
If the syncing problem remains with the new Outlook profile, the issue may be elsewhere. The network infrastructure may have a problem; permissions may not have been correctly replicated throughout the infrastructure when the shared mailbox owner gave access to the target user, and so on.
Examine if you can access the shared Mailbox using the cloud-hosted service Outlook Web App, the Microsoft Exchange Web-based email client.
The user interface is similar to Microsoft Outlook; however, the client program (Outlook) does not need to be installed on the PC. When Outlook fails, we may still access e-mail, calendars, contacts, tasks, and other mailbox items.
- Go to https://login.microsoftonline.com, enter your login information (Outlook email address and password), and log in.
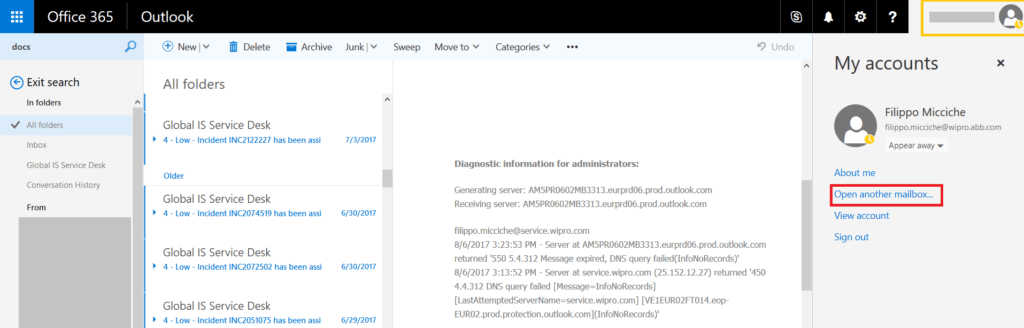
- Select “Open another Mailbox” from the upper right user icon.
- Insert the shared mailbox email address.
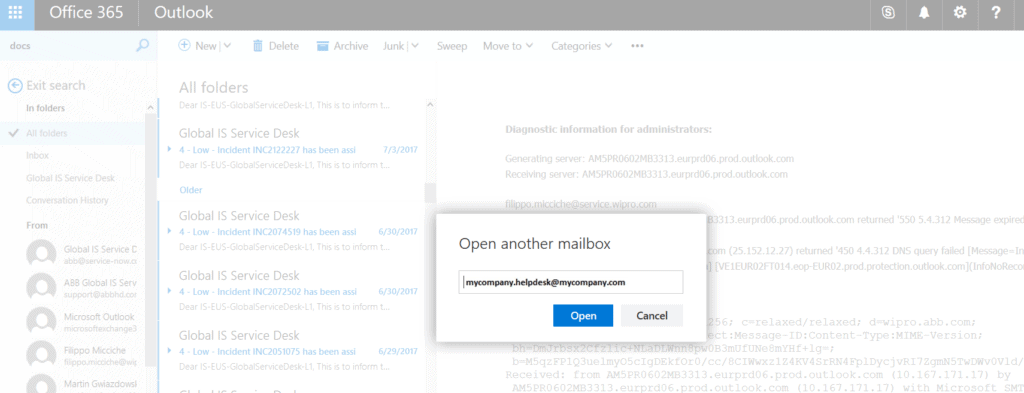
- Click on Open.
If the Mailbox is accessible and adequately syncing via Outlook Web App, this indicates that the problem is local, with Microsoft Outlook, and you should check into it more.
If the shared Mailbox is not visible or syncing correctly on the web app, the issue is most likely at the server level. You should contact your system administrator in this scenario.
How to Add shared Mailbox in Outlook
Once your shared mailbox account is available (established either on-premises or in Azure Active Directory), you can add it to your Outlook profile.
You should bear in mind, however, that there are several ways to do this. Depending on the infrastructure on which Office 365 is based, a shared mailbox installed using a technique other than the one indicated below may not operate as intended or generate error messages.
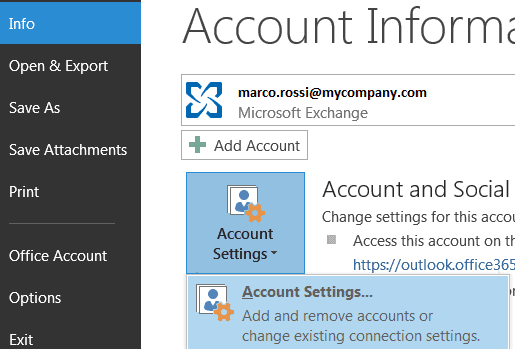
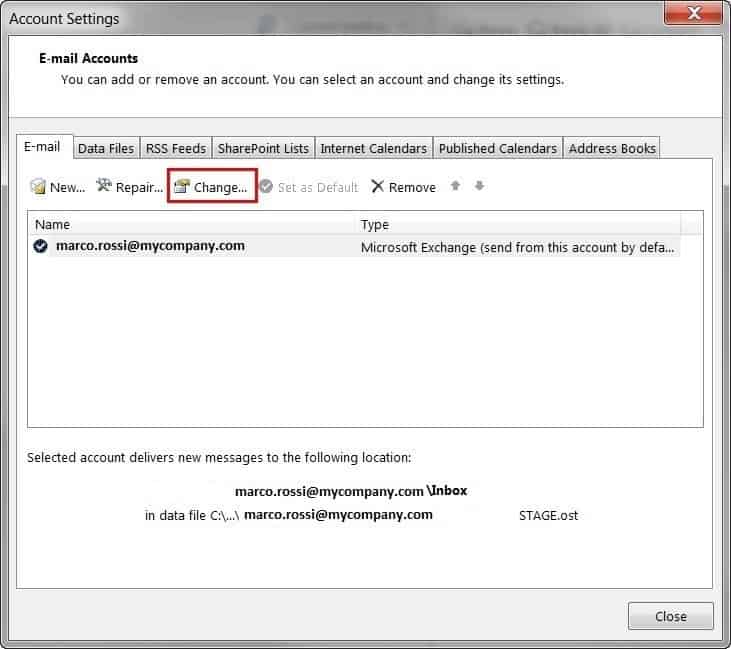
- In Outlook, go to File> Account Settings > Account Settings.
- Add an Extra Shared Mailbox
- Choose your profile and then click Change.
- Select More Settings from the drop-down menu.
- Additional Options
- Click Add on the Advanced tab.
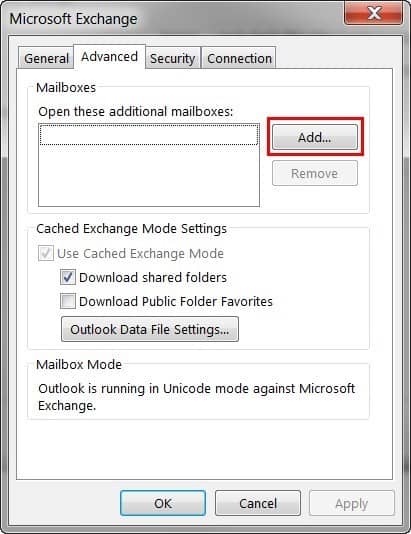
- The Advanced tab
- Enter the shared Mailbox’s email address or name, then click OK.
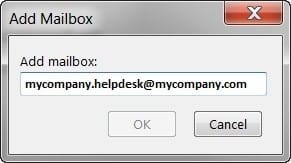
- the shared Mailbox’s name
- Once configured, the shared Mailbox will be available in Outlook’s left folder pane.


