
In Exchange Online, shared mailboxes allow a group of users to access and send email from a single mailbox. Understanding the restrictions of shared mailboxes in Office 365 is critical for setting the proper expectations for consumers. Many users have queries about using shared mailboxes and User mailboxes.
A Shared Mailbox is a mailbox that is not mainly connected with a single user and is typically designed to allow several users. A mailbox assigned to an individual user in your Exchange organization is referred to as a user mailbox. Messages, calendar items, contacts, projects, documents, and other essential business data are generally stored in it.
This blog article will attempt to develop a knowledge of shared mailbox restrictions to assist customers in deciding whether to utilize a shared mailbox vs. a user mailbox.
What Is the Difference Between a User Mailbox and a Shared Mailbox?
User Mailbox: User mailboxes are Exchange mailboxes connected with individuals, with generally one mailbox per person.
Each user mailbox is connected with an Active Directory account, which allows the user access to the mailbox to send and receive email messages and schedule meetings and appointments.
Shared Mailbox: A shared mailbox is an inbox in which several persons may send and receive emails from the same address. This is ideal for a business that wants to share the burden of responding to consumer questions.
An email sent to the shared address can be responded to by any member of the shared mailbox. And any responses will look as though they were sent from the shared mailbox address rather than the individual user.
Understanding Office 365’s Shared Mailbox Restrictions
- Although they are free and do not require a subscription, each user that utilizes the Shared Mailbox must be granted an Office 365 license.
- Users having an Exchange Online Kiosk license cannot access it.
- Emails sent to and received by the Shared Mailbox can be stored here.
- Data transferred from on-premises Public Folders can be stored here.
- Each shared mailbox can be up to 50GB in capacity, however, shared mailboxes larger than 50GB must be licensed.
- A shared mailbox lacks a username and password and cannot be accessed directly by users.
- A user must first sign in to their mailbox before opening the shared mailbox with rights.
Shared mailboxes are not mainly connected with particular users and are typically designed to allow numerous users, such as departmental users, the sales team, HR, and so on.
- It cannot be used to archive a user’s emails.
- It cannot be used to keep a journal.
- ActiveSync clients are unable to access it.
- The Unified Messaging functionality is not supported.
- It cannot be accessed using the Outlook client. To use the Outlook client to access a shared mailbox, you must first configure a user mailbox with access to the shared mailbox.
- A deactivated user account is always connected with an Active Directory user associated with a shared mailbox.
How to Create A Shared Mailbox?
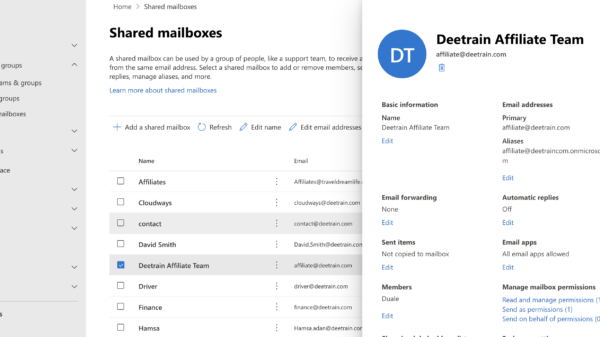
It’s simple to set up shared mailboxes so that a group of individuals may check and send emails from a single address, such as info@deetrain.com. When a group member answers a message sent to the shared mailbox, the email appears to be from the shared mailbox rather than from the individual user.
A shared calendar is included with shared mailboxes. Many small companies prefer to utilize the shared calendar to keep track of everyone’s appointments.
For example, if you have three individuals who make customer visits, they may all input appointments on the same calendar. This is a simple method to keep everyone updated on where individuals are.
Creating a shared inbox and adding members to it.
1. Sign in with a global administrator account or an Exchange administrator account.
2. If you see the warning “You do not have the authorization to view this page or perform this operation,” you are not an administrator.
3. Navigate to the Groups > Shared mailboxes page in the admin center.
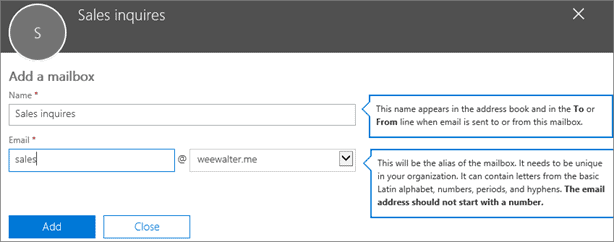
Select + Add a mailbox on the Shared mailboxes page. Give the shared mailbox a name. The wizard then selects an email address, although you can change it.
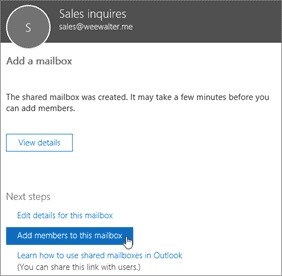
4. Click the Add button. It may take a few moments for you to be able to add members.
5. Select Add members to this mailbox under Next steps. Members are the persons who will be able to see the incoming mail and outgoing responses to this shared mailbox.
6. Choose the +Add Members option. Place a checkmark next to the persons you wish to utilize this shared mailbox for, then click Save.
7. Select Close
You have a shared inbox with a shared calendar. Proceed to the following step: disable sign-in for the shared mailbox account.
How to Create an Exchange Server 2016 User Mailbox
In Exchange Server 2016, there are two ways to build a User Mailbox. You may build mailboxes for existing Active Directory users or establish new mailboxes that will ultimately generate related Active Directory user accounts. Regardless of how you establish a user mailbox, an active directory user account and the corresponding mailbox will be created in the Exchange server. We will create a user mailbox in this post.
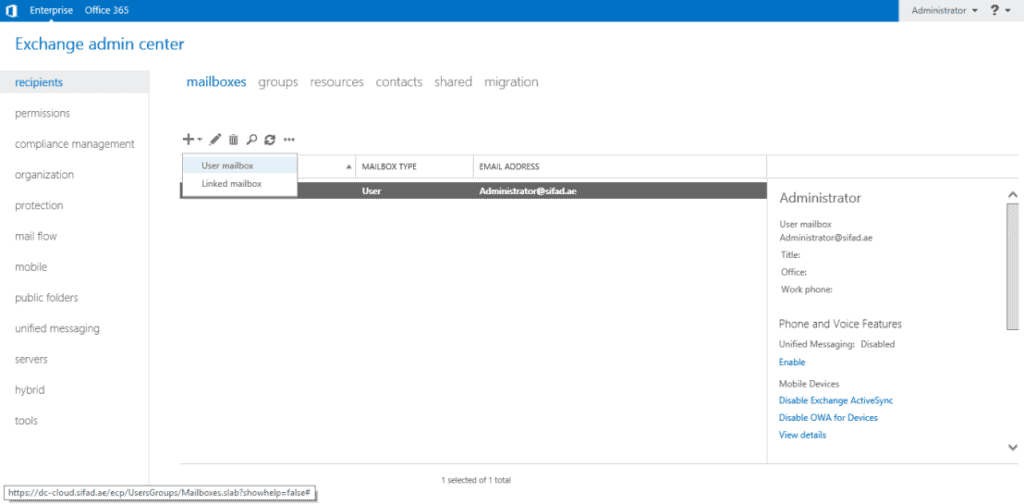
1. Log in to Exchange Admin Center (EAC) and then click recipients in the features pane. Choose the Mailboxes tab. Click —-> Add and then choose User mailbox.
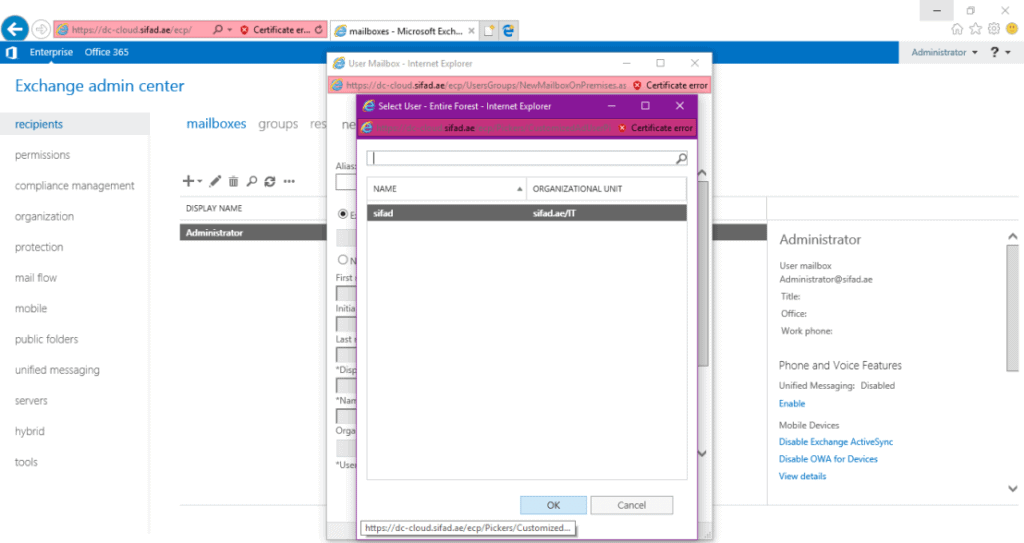
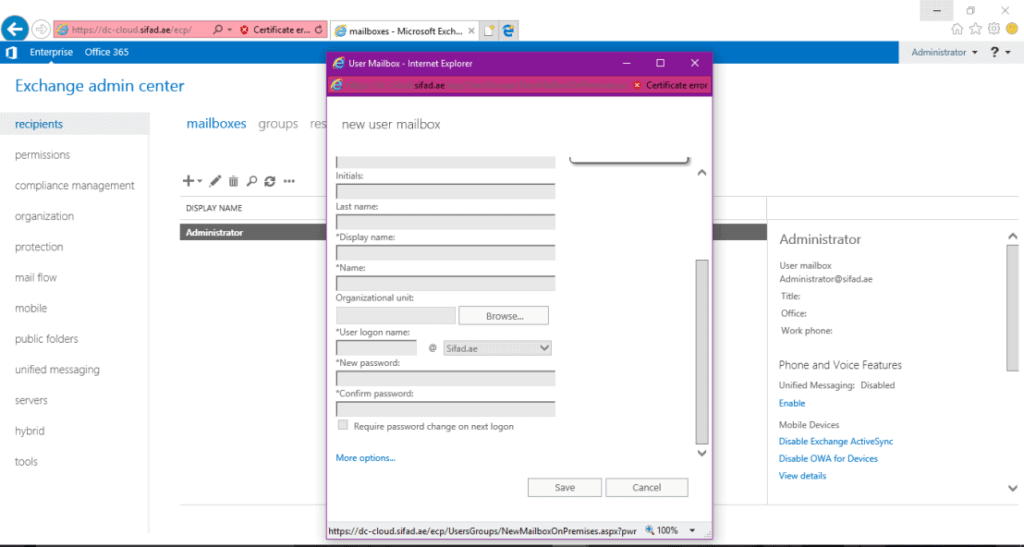
2. If you already have a user account in Active Directory, choose Existing user. If not, select New user and begin filling out the fields to create a new user in Active Directory. Click Browse to get to the related user account in Active Directory.
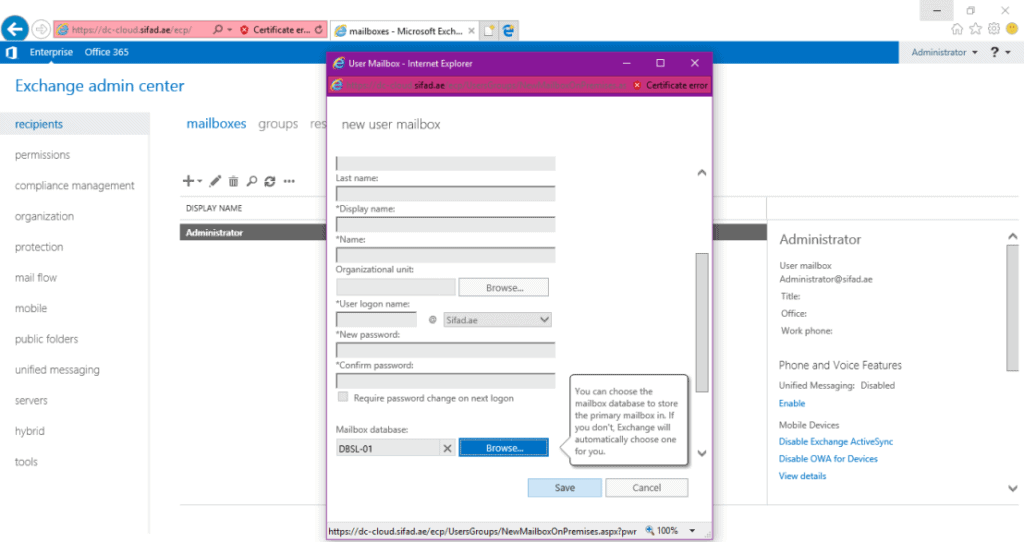
3. To create a mailbox for a user account, choose it from the list.
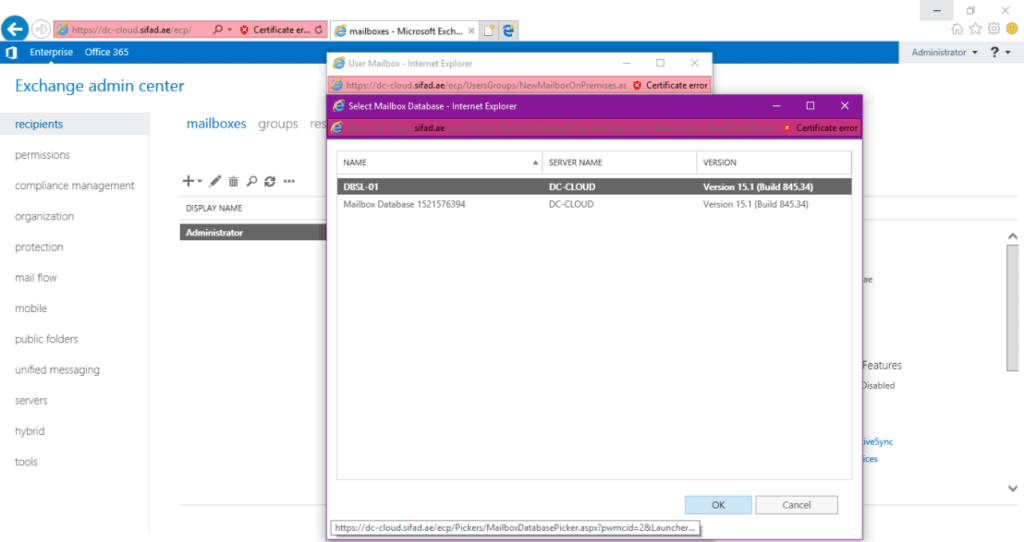
4. Click the more option.
5. To specify a custom mailbox database, click Browse under Mailbox Database. Choose a database. Click the OK button. Before this stage, you must establish a database. Save the file.

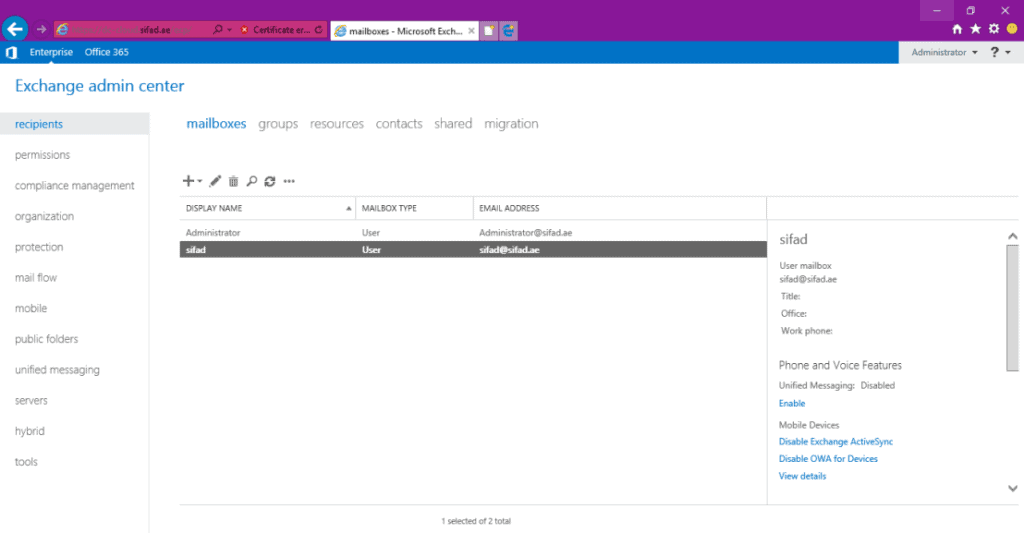
6. The user account has now been created, as seen above. Other mailbox kinds, such as shared mailboxes, linked mailboxes, and resource mailboxes, can also be configured.


