
Managing the incoming email traffic is made much easier by the use of rules. In the same way, you can add rules to your ant and to any shared mailboxes you have access to.
All users who have access to your shared mailbox will be bound by the rules you set up for it. Included in this are features like message forwarding and automated responses. As a result, using shared mailbox rules is a terrific approach to ensure everyone is on the same page.
If you set rules for a shared mailbox, do those rules apply to all users who use it, or do they only apply to the user who makes them? This is a crucial topic to answer since the incorrect individuals adhering to your standards might result in some significant issues if they are not addressed. In the following article, we’ll take a more in-depth look at the operation of shared mailbox rules.
Do the rules for the shared mailbox apply to each user?
All users with access to a shared mailbox are subject to the rules governing that inbox. These rules can assist in managing email received in the shared mailbox and can automate specific activities, such as forwarding messages or automatically sending responses.
To make changes to the rules that govern a shared mailbox, you will need to be logged in as a member of the management group that oversees the shared mailbox.
Why should shared inbox rules be created?
Teams can better manage their emails by defining rules in a shared Outlook 365 inbox. These rules allow for the creation of triggers that cause actions to be carried out automatically.
To ensure that messages are sent to the appropriate individuals, teams can build rules that move emails sent from particular customers into particular folders or completely block certain team members from receiving specific emails.
Shared inboxes make it easier for your team to operate more effectively and prevent emails from falling through the cracks, ensuring every customer receives a response.
How can I create rules for a shared mailbox in Outlook 365?
Open your Outlook 365 account settings, navigate to the “Email” tab, and click the “New” button. This will allow you to begin adding rules to your shared inbox.
Then, in the space labeled “Your Name,” provide a name for the shared inbox you’ve created, such as “Customer Support” or “Sales.” Continue to fill out the information of the shared inbox that you have previously set up, including its email address and password, if you haven’t already done so.
After that, you will need to login in with your account so that you will have access to the shared mailbox. Finally, you will need to restart Outlook 365 to make your modifications effective.
You are now in a position to begin adding rules to your shared inbox now that it is operational and all members of your team have access to it.
The most specific rules for shared inboxes to put in place.
Every rule that you make in Outlook 365 must contain all three of the following components:
- A name.
- A condition.
- An action
You may also add numerous conditions and actions to a single rule, and more particular practices can incorporate exceptions that need signs to make them more accurate.
The following is a list of typical rules that you might wish to implement to make it simpler for everyone to manage their shared inbox:
1. Send pre-written responses to incoming emails.
To configure your shared inbox so that it will automatically respond to emails, click the admin center inside your settings and navigate to:
- Automatic responses > Edit.
- Place the toggle in the “On” position.
- Choose between internal or external delivery.
After that, you will need to compose an answer that will be automatically sent out in response to each email and then click the “Save” button.
2. Save every sent email
By preserving every email that is dispatched from the account, you can maintain a level of transparency inside your shared mailbox.
Launch the settings for your device and navigate to the “Sent Items” setting:
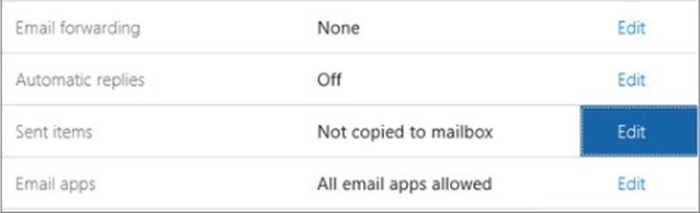
To ensure that every email sent from the shared inbox gets copied into the mailbox, choose “Edit” and then alter the settings.
3. Send every email to a different account by default.
When an email arrives in your shared inbox, you should check to see that it is sent to the appropriate mailbox.
To add a new rule that applies to incoming emails, open the settings for your shared inbox, select the inbox rules tab, and then click the plus sign. Then:
- In the box labeled “When the message comes,” choose “Apply to all messages” and click the button.
- To access other choices, select “Do the following” from the menu.
- Choose either Send, Forward, or Redirect to send the message.
- After that, pick either Forward the message or forward it as an attachment to the recipient you want to send it to.
- In the final step, choose the email address you would like the messages to be forwarded.
When you press the save button, the rule will immediately be implemented. It is important to remember that the reply sent from the redirected address will only go back to the shared inbox and not to the person who originally sent the message.
Therefore, this kind of rule is ideal for groups needing internal conversations before responding from a shared inbox.
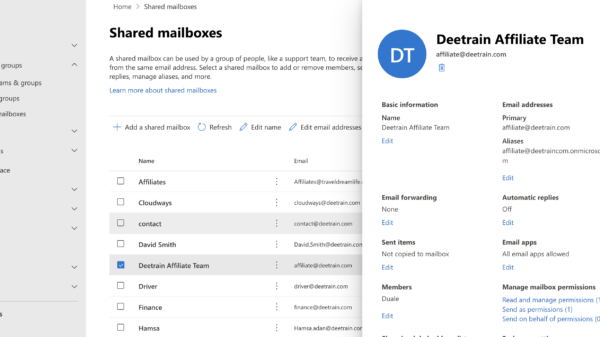
4. Access to the shared mailbox should be restricted for users.
You don’t want all of your team members to be able to access the shared mailbox, do you?
No issue. You have the option of putting in place a rule that will restrict who may access a shared inbox. Launch the administrative console of the shared mailbox, and then:
- Locate the area labeled “Active Users.”
- Select the person on the team who should not have access to the inbox and click the corresponding button.
- Choose the “Block” option.
- Save your changes.
And just like that, the selected team member will no longer have access to the shared email you’ve been using.
Do the rules apply to shared mailboxes as well?
In the same way, you can add rules to your account and to any shared mailboxes you have access to.
Why are some Outlook rules only accessible on the client side?
The criteria and actions that are described at the time a rule is created are what ultimately decide its type. For instance, if you make an action in your Outlook rule to Permanently delete it or Mark it as read, the rule will only apply to the client version of Outlook.
Bottom Line
So, do the rules for shared mailboxes apply uniformly to all users? The correct response is both yes and no. Messages sent to the shared mailbox are visible to all users; nevertheless, each user is responsible for managing incoming and outgoing messages according to their own unique set of guidelines.


