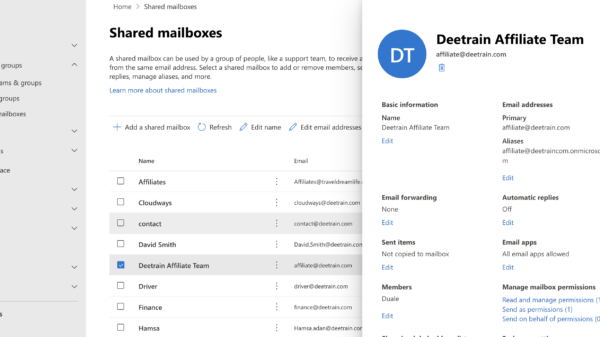
OWA is a web-based program that lets you access your Outlook email. It was originally known as Outlook Web App, but it is now more commonly referred to as Outlook. It is a rare problem to be unable to open a shared mailbox in OWA.
When users try Web App to access a shared mailbox, they see a blank page. This issue arises because you cannot directly access a shared mailbox using Outlook Web App in office 365. If the shared mailbox is not opening, you may try disabling, restarting Outlook, and re-enabling Cached Exchange Mode in your Outlook profile’s advanced profile configuration options.
If you need to access a shared mailbox and want to use the Office 365 Outlook Web App (OWA) rather than your desktop/laptop Outlook client, you have various options: Read on to learn more about how you may accomplish this.
How to Open Shared Mailbox in OWA?
To gain access to a shared mailbox, you must first obtain authorization from the mailbox manager, often known as the “owner.”
Follow these steps to open a shared mailbox in Outlook Web App:
1. Navigate to the Office 365 portal.
2. Choose Outlook.
3. Select the user name in the upper-right corner of the page, and then select Open another mailbox.
4. Enter the name of the shared mailbox, then click Open.
Now, let’s have a look at a step-by-step guide for opening a shared mailbox in OWA:
Add a Shared Email Account Through OWA.
1.Use OWA to access your mailbox.
2.Right-click your name in the folder list on the left and select Add shared folder…

3.In the Add shared folder dialog box, enter the mailbox’s email address or name and click Add.

4.The mailbox is now visible in your OWA folder list.

Please keep in mind that you will only view those folders if you have only been allowed access to particular folders in the other user’s email.
If you no longer require the additional mailbox to be visible in your Outlook Web App, right-click the folder and choose to Remove shared folder.
Send email from a shared mailbox in OWA
Send an email from a shared mailbox in OWA and open the mailbox in a new browser tab or window. To accomplish this,
1.In OWA, click your account initials or image in the upper-right corner.
2.Choose to Open another mailbox.

3.In the box that appears type the name of the mailbox. The extra mailbox appears in a new tab or window.
4.To create a new email, click New.

a. Select Show From from the More Actions ellipses. This option indicates that the individuals who receive the email message will see that it came from the shared mailbox rather than your email account.
Note: The name of the shared mailbox account will not appear in the Show From drop-down the first time you use it to send an email. For the first time, remove your name (right-click and select Remove), then put the name of the shared mailbox in place of your name and send the message.
The name of the shared mailbox will appear in the drop-down next to Show From in the future, and you will be able to pick it.
b. To add recipients, enter the name of anybody in your contacts folder or your organization’s address list, or enter the email address in the To or Cc field. When you input a person’s name for the first time, Outlook Web App looks for that person’s address. In the future, the name will be stored so that it may be resolved fast.
c. Enter a subject.
d. Fill in the blanks with the message you wish to send.
e. When your message is complete, click Send.
In OWA, open another person’s mailbox in a new browser window.
If you do not want to add the other person’s mailbox to your OWA folder list, you can access it in a different browser window.
1.Use OWA to access your mailbox.
2.Click on your name in the Navigation bar at the top of the OWA screen. There will be a drop-down menu displayed. Click Open a new mailbox.

3.Enter the email address of the other mailbox you wish to open and press the Open button.

4.The mailbox of the other person appears in a separate Outlook Web App browser window.
Please keep in mind that you will only view those folders if you have only been authorized access to particular folders in the other user’s email.
Using Outlook 365 Desktop, create a shared email mailbox.
1.Log in as yourself to your computer and launch the Outlook Desktop software.
2.On the ribbon, select the File tab.
3.Click Add Account under Account Information.

4.In the resulting window, enter the email address of the mailbox you wish to add and click Connect.

5.Enter your username and password in the Sign in with your UWSP account box that appears, then click Sign In.

The shared mailbox should now appear to the right of your inbox in Outlook.
In Outlook’s Desktop interface, send email from a shared mailbox.
1.Choose the name of the shared mailbox from the list on the left.
2.In Outlook, click New Email in the upper-left corner.
3.The name of the specified shared mailbox should appear in the From line.
Access With a Direct URL
To navigate straight to a shared mailbox in Office 365 OWA without first opening your own, you must use (and bookmark) a unique URL for each shared mailbox you want to access this way:
https://outlook.office365.com/owa/[email address]@hec.edu/
The URL is https://owa.hec.edu/owa/deetrain@hec.edu if the shared mailbox for the Derrick The Oiler Fan Club email is deetrain@hec.edu.
Signing in with your Office 365 username and password will take you right to the shared mailbox.


